
Space Design and Organization
Topic 1 | Space Design and Organization
Space Design
When designing a space for your food bank, it is important to consider the flow of how your employees and volunteers will work in the space. It is also important to consider how the space itself can support safe food handling.
Whether you are in a large or small food bank, you can organize your space to meet these principles of safe food storage:
- Store non-food items separate from food items.
- Store allergens separately in clearly marked areas.
- Have a separate food repackaging area to prevent cross-contamination with other donations.
- Toilet facilities should not open directly into an area where unpackaged food is handled or stored.
- Do not store food under plumbing or pipes that may leak on the food or on the floor.
If you are making changes to your food bank or looking at new spaces, consult your Public Health Inspector. They can give advice about potential safe food handling issues.
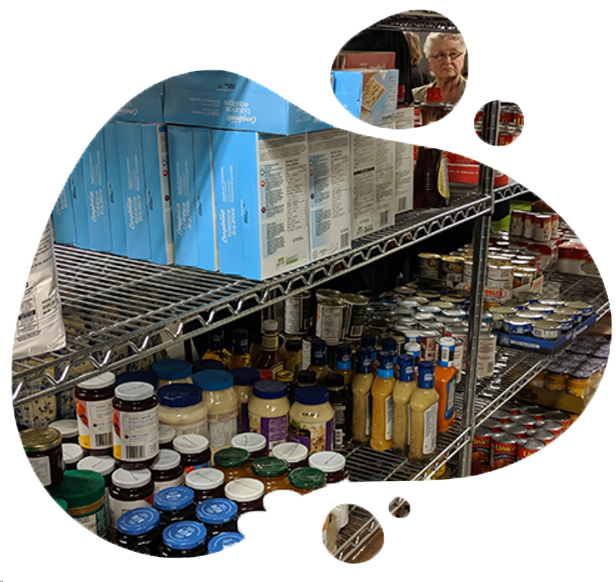
Non-Perishable Food at Red Water Food Bank
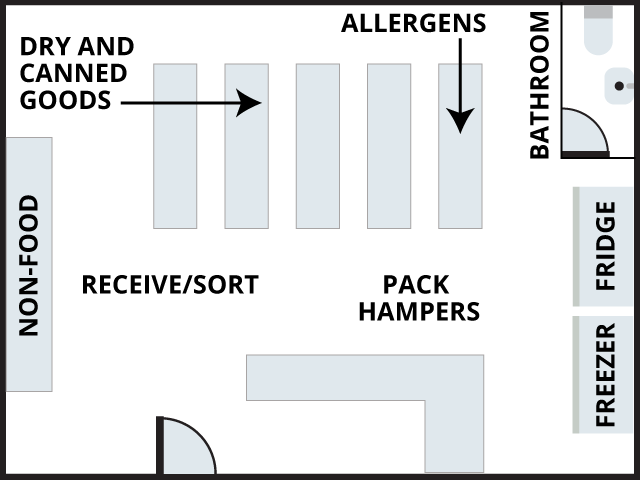
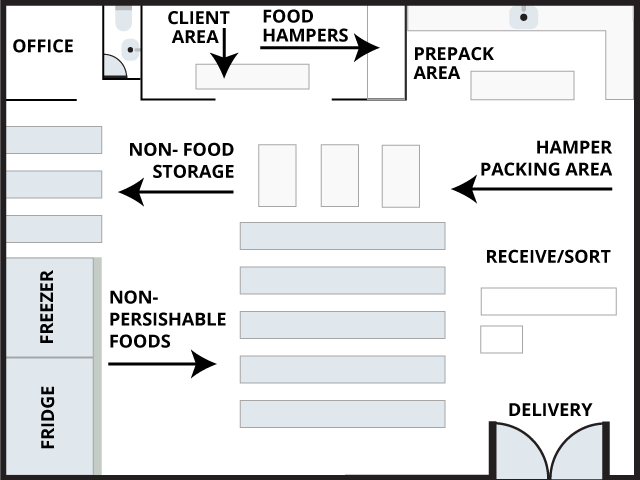
These two floor plans are examples of how you might design a food bank space:
Temperature and Humidity
Temperature is key to safe food storage. All storerooms, refrigerators, and freezers should be equipped with accurate thermometers. Check thermometers daily to make sure they are functioning correctly. Temperature guns can confirm that thermometers are accurate.
Your storeroom temperature should stay between 10 and 20°C. Keep refrigerators and coolers at 4°C (40°F) or colder and freezers at -19°C (0°F) or colder. Avoid temperature extremes and large temperature fluctuations because they accelerate food deterioration and spoilage.
Keep storerooms cool, dry, and well-ventilated. Humidity should stay below 15%. When the air cools, it releases excess moisture, covering surfaces and leading to moisture damage.
Here are some tips for maintaining safe temperatures:
- Store foods out of direct sunlight.
- Monitor your storage for electrical and mechanical failures.
- Be aware of ventilation and where it may create hot or cold spots in your storeroom.
Stock Rotation
Rotate your stock frequently using the First In, First Out (FIFO) rule. Stock rotation is placing all new stock behind or underneath the stock that is closer to its best before or expiry date. This maximizes your donations, prevents stockpiling older foods, and reduces food waste.
To do this most efficiently, group and organize the same or similar products together.
Based on the best before dates on these juice bottles, we want to distribute them from 1 to 4. Bottle 1 has the earliest best before date, and bottle 4 has the latest best before date.


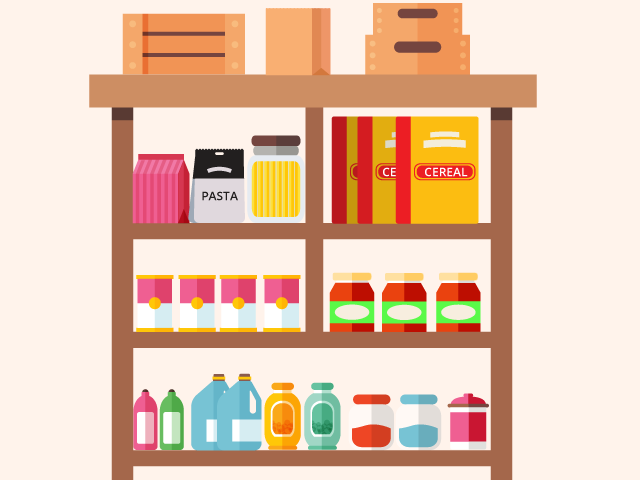
Position of Non-Perishable and Refrigerated Foods
Carefully consider how to store your food on the shelves and within refrigerators or freezers. Place items that contain liquid or are at a higher risk of leaking on the middle and lower shelves. Place heavier items on lower shelving units to prevent top-heavy shelves and reduce lifting injuries.
In your refrigerator or freezer, store raw foods away from cooked foods. Keep raw meats and other food items that could leak or spill on lower shelves and bins.
Refrigerated Foods
Hover over (+) symbols to learn more.
Refrigerated Foods
Tap (+) symbols to learn more.
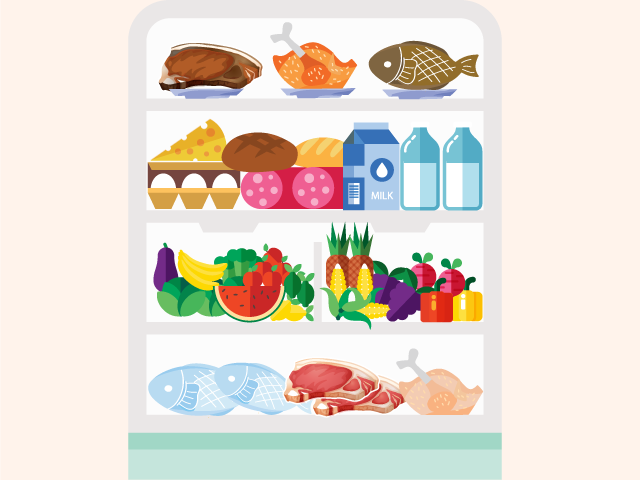
meat and cooked food
on the highest shelf
of the refrigerator.
eggs should be stored in the
coldest part of the fridge,
usually near the back
and away from the door.
crisper or produce drawers
for veggies.
fish, and poultry that you
plan to freeze.
Dry Foods
Hover over (+) symbols to learn more.
Dry Foods
Tap (+) symbols to learn more.
on top shelves to minimize
leaks or spills on lower
shelves.
risk spill foods such as
cans and jars below dry
goods.
non-perishable food
items with the highest
risk of spilling on
bottom shelves.
Food Storage for Food Categories
Category 1
E.g. canned foods, crackers, flour
Category 1 – Non-Perishable Foods
Storage Requirements: Canned and dry goods do not require any additional storage conditions unless noted on the label, such as “keep refrigerated” or “refrigerate after opening.”
Category 2
E.g. fresh vegetables and fruits
Category 2 – Low Risk Perishable Foods
Storage Requirements: Put fresh and frozen foods in refrigerators, coolers, and freezers as soon as they are delivered. Maintain good air circulation in refrigerators, coolers, and freezers. Do not overfill with food. This will prevent spoilage and freezer burn.
Some fruit and vegetables, such as potatoes, tomatoes, bananas, onions, sweet potatoes, and pumpkins, can be stored at ambient temperature. Other fruit and vegetables, such as rutabagas, turnips, and squash, can be safely stored at the ambient temperature for short periods or refrigerated for long periods.
NOTE
Ambient temperature refers to the temperature of the air in a given space.
Category 3
E.g. milk, cheese, meats
Categories 3 & 4: PHF and High-Risk Foods
Storage Requirements:
Distribute non-frozen, ready-to-eat high risk foods so they can be consumed within 72 hours from the time of preparation/production.
Be especially aware of the position of Category 3 and 4 foods within refrigerators and freezers. Avoid storing them over or near food that they could leak on or cross-contaminate.
Storing Non-Food Items
Non-food items must be stored separately from food items. This can be on separate pallets, in separate shelving, or with appropriate packaging. Store these items at ambient temperatures and protect from extreme temperatures.
When shelving non-food items, consider which items are at risk of spilling and contaminating items below. Liquid and powdered items, such as laundry detergents and cleaning supplies, may spill and contaminate food products or other non-food items.
Put low spill risk items like paper products on the higher shelves above the liquids and powdered products which have a high risk of spilling.
Non-Food Items
Hover over (+) symbols to learn more.
Non-Food Items
Tap (+) symbols to learn more.
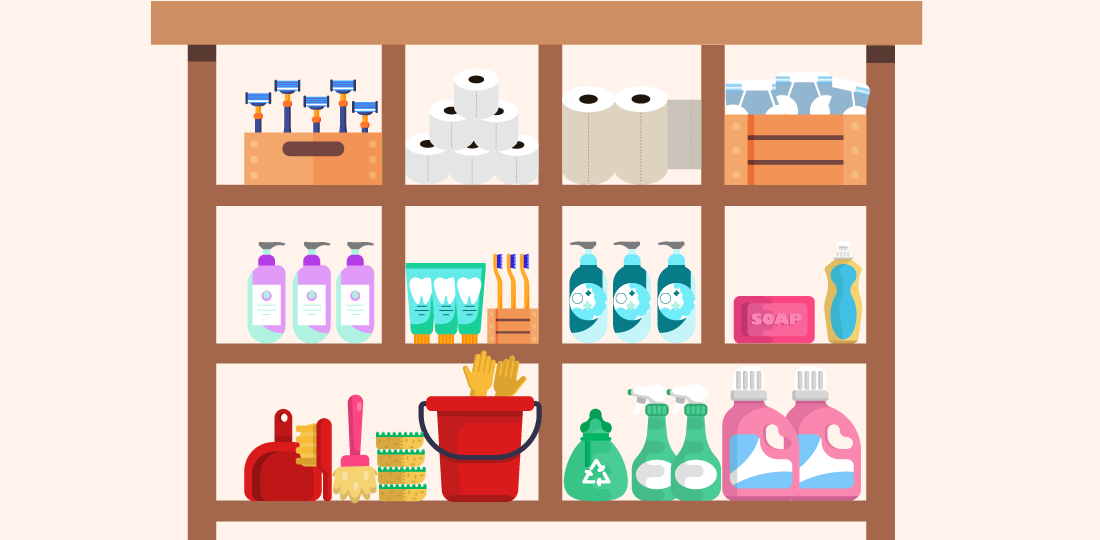
Items such as toilet paper,
paper towels, and diapers
should be stored on high
shelves.
Place high spill risk items
such as cleaning supplies
and laundry detergent on
lower shelves.
NOTE
If your food bank has limited space, store non-food items on lower shelves so they will not spill and contaminate food.
Featured Food Banks
Hover over the images below to see your peers at other Alberta food banks, or possibly your own!
Featured Food Banks
Tap the images below to see your peers at other Alberta food banks, or possibly your own!
Red Water
Millet
Leduc
Putting it Into Practice
Case Study: Designing Functional Spaces
The Root Cellar Food & Wellness Hub in Medicine Hat recently moved into a newly renovated space designed to improve food safety. In the old facility, the stainless-steel table where they repackaged bulk food was across the building from the sink. They had to cross the building to wash bowls and scoops. “Our new space has a packaging area that has a full kitchen with a sink that supports us to be able to clean more efficiently and thoroughly,” says Melissa Mullis from Root Cellar. They also added a new dishwashing station with Ecolab chemicals to make sure that the dishes are clean and sanitized as well as many hand-wash stations.
“Our Brown Bag lunch and community kitchen programming operated in borrowed spaces in local churches,” says Melissa. The food bank was bringing food from their facility to the churches and dealing with food safety challenges specific to each location. In the new facility, they have four teaching kitchens and a commercial kitchen. “We can make certain that food safe guidelines are being followed by our volunteers, staff, and participants,” says Melissa. “Having it all in one place means we don’t have to transport food across the city. We simply go in the cooler to access the supplies we need.”
Food for Thought:
- Are there small things your food bank can implement to improve food safety?
- What are food safety challenges that your food bank faces because of constraints presented by your facility?

Melissa Mullis
Marketing and Events Manager
Root Cellar, Food & Wellness Hub
Medicine Hat, AB
Check Your Understanding
The following questions will test your knowledge of this module. Hit Check to see your score and Retry if some answers are incorrect. Click Mark Complete once each question is correctly answered to move to the next topic.